


There are lots of whirleygig tutorials in the blogging world. Allie at "Stranz . . . Obsessive Quilting Disorder" has a tutorial which is very easy to follow. You can find it here. "crazy mom quilts" also has one here. If you want a tutorial which instructs you to trim a bit off your square at the beginning, instead of having to trim the whole block at the end, visit Quilting on Turtle Hill's blog for a nice tutorial.

56 (6") blocks, 7 across, 8 down.
My finished block size was 6 inches.
To make 1 block:
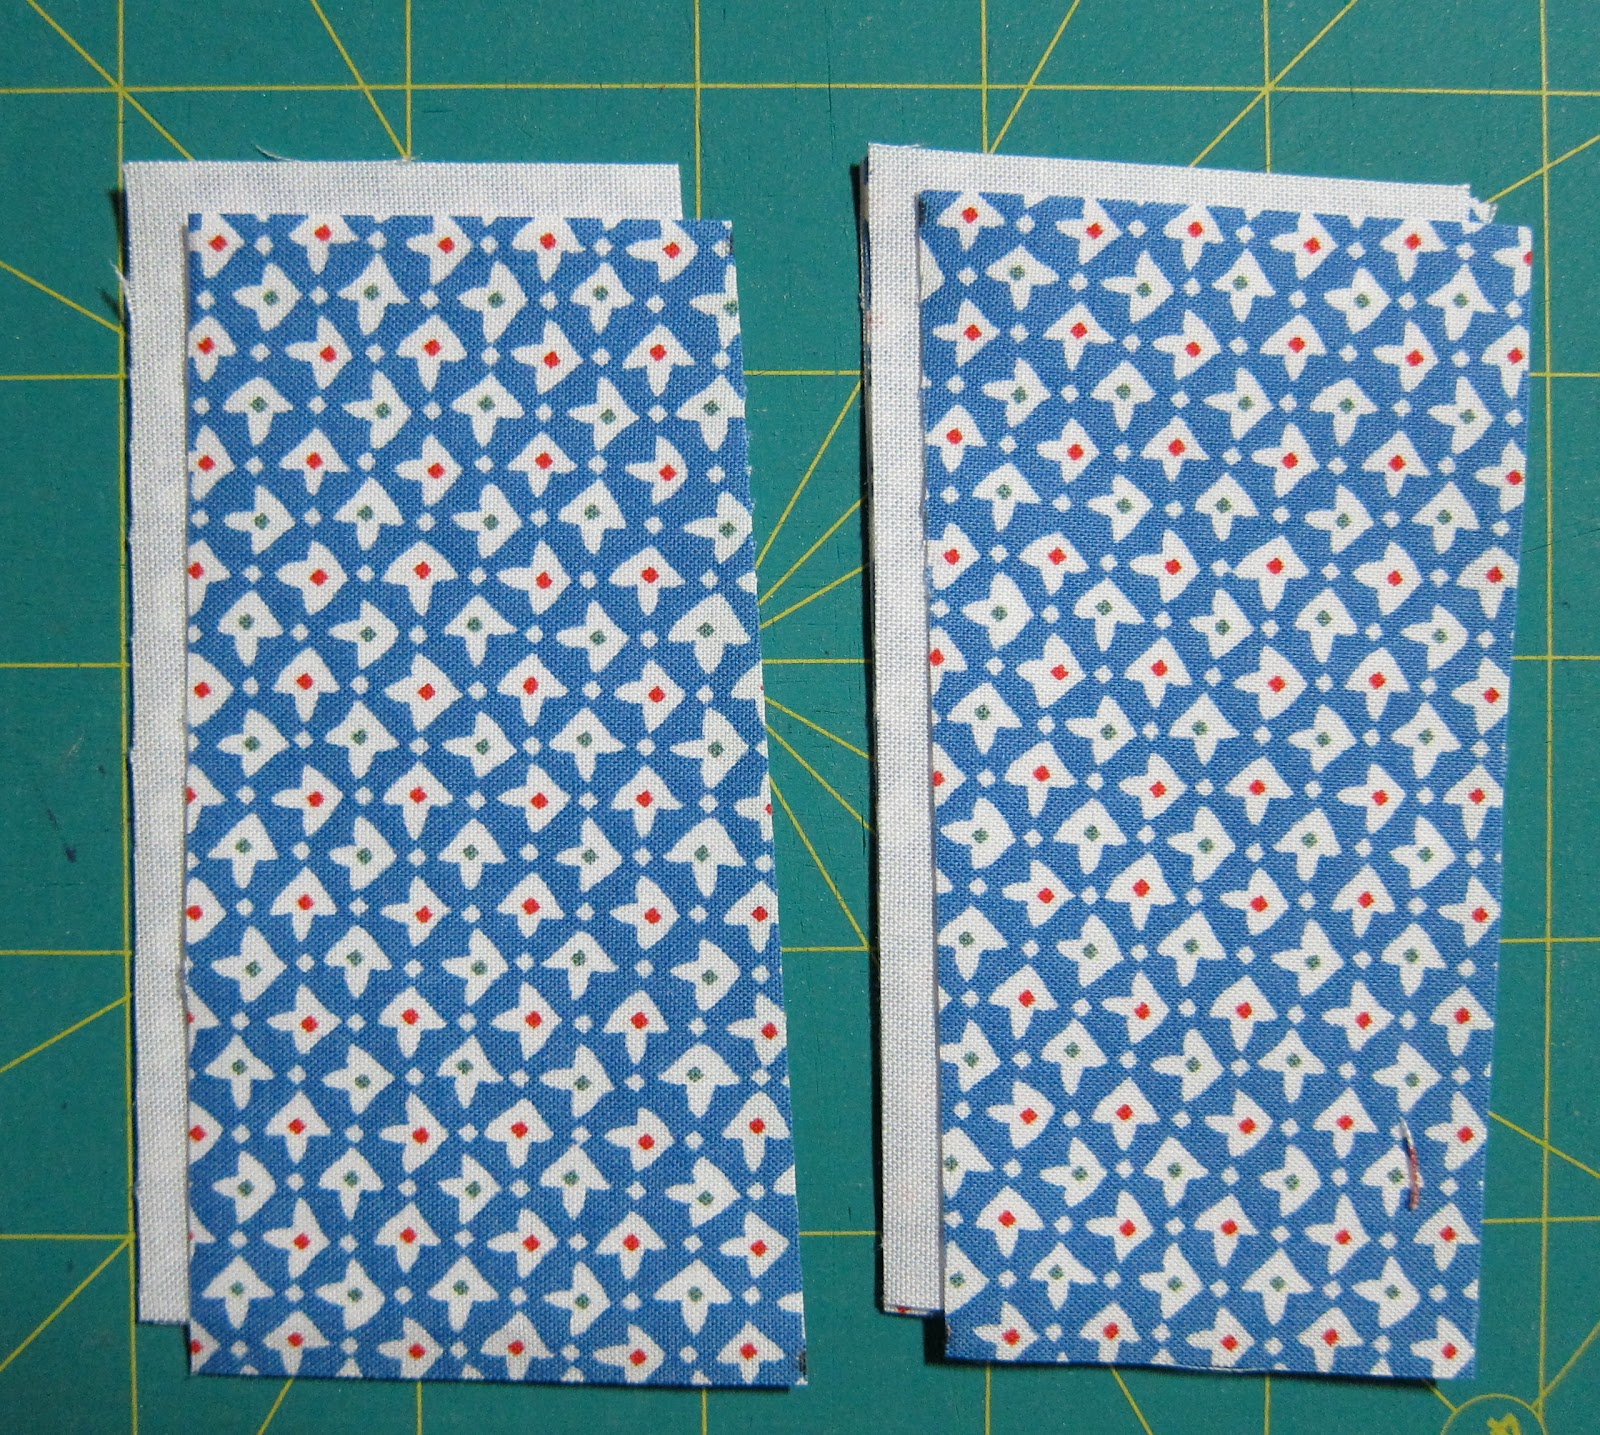
Cut 2 calico 4 inch squares
Cut 2 white 4 inch squares
56 different fabrics is a lot to come up with. On Calvin's quilt, I found 1/2 the amount, and made 2 blocks with each fabric.
Once I have my fabric cut into 4 inch squares, I like to match up 1 calico square and 1 white square, and cut the off-set line with them together. That way I'm sure they'll sew up right, and it helps with the organization of this whole mess.


It's backed with flannel since it's going to a cold climate.

I love comments, otherwise I feel like I'm blogging to myself :) . . . then,
go see the other quilts entered in the Blogger's Quilt Festival, click on this link.
The next time I try this quilt, I want to make a lap size 60" x 80".
I will make the blocks bigger than Calvin's.
48 (10") blocks total (48 fabrics is hard to find)
Use the same fabric for 2 blocks, only needing 24 fabrics.
Finished block: approx. 10 inches.
To make 1 block:
Cut 2 calico 6 inch squares
Cut 2 white 6 inch squares
(cut 4 of each if using the same fabric for 2 blocks as mentioned above)
Cutting the white separately?
Total of white, 96 - 6 inch squares, purchase 3 1/4 yds. of Kona white for 48 blocks. (1/4 yrd. added for good measure :)
Make off-set cut between 1/4" and 1/2 ".
Experiment to determine amount of wonkiness.
You might also like:
 |
| Card Trick |
 |
| Scrappy Log Cabin |
Very lovely! Beautiful quilt :)
ReplyDeleteI love this, congratulations:)
ReplyDeleteWonderful quilt, love the colors!
ReplyDeleteWonderful colours. Although I'm not a fan of blue, in your colour combination it looks very nice. And the blue border fits perfectly :)
ReplyDeletebeautiful!
ReplyDeleteLove this! So bright and cheerful! And the plaid back is great!
ReplyDeleteI love your whirly gigs. You did a great job with your fabric selection and piecing.
ReplyDeleteI love that. A whirlygig quilt is on my to do list. :) Great job- such a happy quilt!
ReplyDeleteLovely quilt and I especially love your backing fabric. I think I might have to add a whirligig to the list of quilts I must make one day.
ReplyDeleteWhat a beautiful quilt!
ReplyDeleteThanks for sharing how you made it.
Your blog is wonderful!
I love whirlygigs, and the fabrics you have used are fantastic!
ReplyDeleteI love this quilt, Linda! I have this pattern but haven't tried it. I think it's time!
ReplyDeleteI love this pattern. Yours looks awesome!
ReplyDeleteLove whirligig quilts andthe colors in this are so lovely and bright! Thanks for sharing and have a great day
ReplyDeleteSuper cute! Thanks for sharing
ReplyDeleteThis is always a great pattern, i don't think I've seen a bad one yet!
ReplyDeleteGreat work!
Hello there! Found you through the Blloggers Quilt Festival and I love your quilt! I'm now following you!
ReplyDeleteLove the colours, this is on my to do list.
ReplyDeleteYour quilt looks great! I never tire of whirlygig quilts. Love the colours you have used and the stippling in the quilting. Lovely work!
ReplyDeleteI've been wanting to make this pattern too. Just lovely!
ReplyDeleteWhat a lovely quilt!
ReplyDeleteI love this quilt, Linda - the colours work really well together! I made a similar one in pink and yellow last year, but you've inspired me to have a go at another one - I'll add it to my list :o)
ReplyDeleteYou did a fabulous job. It looks great. Love the plaid backing.
ReplyDeleteLove your whirlygigs - beautiful!
ReplyDeleteVery cute quilt. Great job.
ReplyDeleteSewCalGal
www.sewcalgal.blogspot.com
Cheerful quilt and warm! I enjoyed learning about it.
ReplyDeleteI love whirlygigs, and yours are just stunning. congrats!
ReplyDeleteKristina
www.priscillacraft.blogspot.com
I really like this whirligig quilt. It's a pattern on my to do list but I always seem to put it off. Maybe I won't anymore after seeing how you acheived the wimpy look, I'm feeling pretty inspired.
ReplyDeleteLove it! and thanks for linking to the tutorial! I've been thinking of making one of these for a while...now I think I will!
ReplyDeleteAdorable! I love this pattern, and the American Jane fabric. Thanks for explaining how to do it!
ReplyDeleteThanks for sharing ! your quilt looks really inspiring - maybe I should try one myself ...
ReplyDeleteSuper cute! Great quilt!
ReplyDeleteLove this quilt! I love how the white makes those whirly gigs pop! Nice work and great pictures!
ReplyDeleteI love this pattern, the first time I made one I didn't realize that when cutting out the fabric it had to be right side up!! The pattern didn;t quite turn out like the original...quilting is a process.
ReplyDeleteLooks really nice. I love your choice of colors.
ReplyDeletecan't go wrong with a whirly gig or some american jane!
ReplyDeleteYou can see my submission to the Blogger's Quilt Festival here: http://blog.petitdesignco.com/2011/05/bloggers-quilt-festival.html
The colours are very crisp against the white. I like the design.
ReplyDeleteWonderful quilt! You make the whirly gig thing look so easy!! I may just have to finally give that one a try. Thanks for sharing.
ReplyDeleteCheers!
Rachel
http://www.dewberrylane.com
Your whirleygig quilt is awesome! Great choice of fabrics.
ReplyDeleteThis may very well be my next pattern to try. It is a cute quilt, and would be a good one for my grandson. Yours is very cute, and those squares do pop!
ReplyDeleteThis is a super fun quilt! Thank you for sharing the tutorial link. I will have to keep it for reference. I think it is a great pattern for ayoung child! AWESOME!!
ReplyDeleteYou are not blogging to yourself with 40 plus responses. Such a beautiful quilt and I love the way you did your backing. I have been eying these kind of quilts for a while.
ReplyDeleteThis quilt is so fun! Love the bright colors! I will have to try this pattern some time! :)
ReplyDeleteI love this quilt. I featured it on my blog today.
ReplyDelete