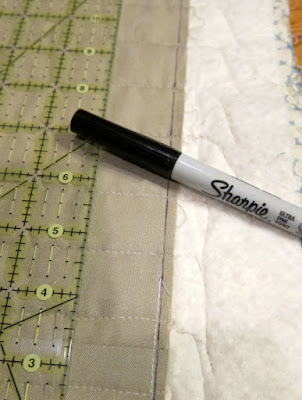
After quilting, mark where your cutting edge will be. (emily: your sewing edge is the edge of the yellow) Find the smallest width of your sashing along the edge, and use that measurement all the way around your quilt, or at least on that side. Do not trim your batting and back fabric yet.
emily: start sewing your binding on in the middle of a side, not a corner. Leave 12 inches of the binding hanging (you'll need a little slack to sew the other end to)
emily: Place raw edge of binding along yellow edge and sew 1/4" from the edge
Mitered Corners:
emily: sew towards the edge and stop 1/4" before the edge, you can just guess. Back stitch so it doesn't come undone.
emily: move your quilt away from the machine. Fold the binding at a 90 degree angle. I imagine a straight line from the raw edge of the binding down along the next edge I'm going to sew on.
emily: then fold the un-sewn binding down along the next edge. So, that top edge is a fold.
emily: start sewing again 1/4" from the edge, back stitching at the top to secure it.
When you get to the 4th side, stop sewing 12 inches from where you began. At this point, you will need to attach both ends. If you can't figure it out, call me. Make sure not to cut the fabric too short. . . call me!
After you're all done sewing it on to the front, fold the binding over, and sew down 1/8" from the edge. Use brown thread if you can. Call me if you need some.
All be home all week-end, so call.
After the binding is all sewn on, trim off the excess backing and batting. Be careful to keep the seem allowance the exact same all the way around, using your sewn line as a guide.
This was my first attempt to free-motion quilt a name into the quilt. I'm the newest biggest fan of the idea.


What a great idea to quilt the name of the user to the quilt.That make's it very special.
ReplyDeleteCindy W, Aus
ReplyDeleteHi Linda, love your Finishd quilt and the fabric is very yummy.
I tend to cut my quilts back before binding too, but have never had a wavy binding. I like what you have done with this tute, but have you ever tried to add your binding with your walking foot. I have never done it with out, I just feel the layers don't feed properly without it.
Anyway, found your page via the Quilt Story post.
Gonna grab a cuppa and have a better look around.
Thanks for Sahring.
cindyw6621@yahoo.com.au