Showing posts with label jean/demin. Show all posts

Friday, September 30, 2016

jean rag quilt & giveaway

We have a son in college, and he has a new girl friend.  I figured it was a good time to make his jean quilt with his high school jeans.


 I drew up a pattern and started cutting away.


For each square, I cut a front, a back and the batting, which is 1 inch smaller


sandwich batting between a front and a back square


Sew from one corner diagonally to the other corner.
Repeat, forming an x on each square.  Congratulations, you have just quilted that square, and it holds the batting in place.


finished squares sewn together . . .


Our son served a mission for our church in Bolivia and spent several months in a remote village.  He only had 1 pair of jeans with him to wear.  I used 80% of that pair in this quilt


Those jeans have a lot of tender memories, and give the most character for the quilt.


stats and a few important things to remember:
finished:  60 x 70
20 blocks, 15 inches square
It takes 5-7 pairs of jeans (depending on how long the legs are)
use denim needles 90/14
use 4 color catchers in the washing

With traditional rag quilts, you clip the seams every 1/2 inch or so to create the raggy look, but since jeans fray so well, I just wanted the frayed look.  A few washings took care of that.

Note to self:
After jean/flannel quilt is sewn and ready for washing, fold the quilt in 1/2, flannel sides facing each other (fold longer ends together so that your quilt is long, it will spin better in your washer).
Sew around the 3 open edges with a large stitch.  Then wash.  Undo stitching after washing and drying complete.  This will alleviate HOURS of time having to "de-pill" your flannel side (I may or may not have learned that by experience)


The best part of making a raggy quilt is that after you've sewn your blocks together, IT'S DONE!!!  You quilted it along the way.


giveaway:  winner is Tiffany.


How about you?  have you ever made a jean quilt?  do you have any tips to add?  Leave me a comment if you're interested in this giveaway.

linked:
finish it friday
whoop


Thursday, January 1, 2015

tutorials


doll quilt


paper piecing


crumb quilt


 raggy squares quilt tutorial


re-purposed denim bib


hexi quilt tutorial


raggy binding tutorial


 orange peel free motion design tutorial


 ruffled towel tutorial


cloth diaper tutorial


gift bag tutorial


airplane quilt tutorial


 trip around the world tutorial


summmer baby blanket tutorial


Tuesday, April 24, 2012

WIP Wednesday: repurposed jeans


I love a denim bib, it's classic.  It doesn't wear out, it's soft, it's cute and looks good with everything!  It's non-gender specific so it can get passed down to the next sibling or cousin . . .


If you don't save jeans for sewing projects, you can find little denim pockets at your local resale shop or garage sale on children's clothing or most men's jeans which have a perfect little (change) pocket.  
I have an old kingsize denim dust ruffle that I almost got rid of several years ago.  I'm so glad I kept it, I've used it over and over again.  A seamstress should always have a good supply of denim on hand to recycle, especially if you have teens.  You can save a ton of money repairing holes in jeans.  (I used to iron those jean patches into the backs of holes, but now I just sew a piece of denim to the back)


Bib directions
Pick 2 coordinating fabrics (preferably 1 in denim! ) I prefer to use flannel for the back, besides it feeling softer, it will absorb more.  Look for a slightly thinner or worn denim when making bibs, as it will be more pliable and not so heavy.

Press and starch your 2 coordinating fabrics.  (When sewing an item with 2 different fabrics, one is bound to shrink more than the other.  I prefer to press with heavy steam before cutting the fabric as apposed to pre-washing.  Starch will help the fabric from becoming distorted while cutting)
With right sides together, pin and mark bib pattern.  Cut out the 2 pieces of fabric together, at the same time.


Pin and sew the 2 pieces,  leaving a 2 inch hole along the bottom of the bib.  Cut notches around the curves to minimize bulk.   Turn right side out and press.

Cut out back side of small denim pocket before sewing onto bib to minimize bulk.  Pin pocket on center of front side of bib.  Sew down along edges using matching thread.  To make pocket functional, only sew along the top of the pocket flap, and up the sides of the pocket, stopping at the top of the opening on each side.  (back stitch to secure edges)


Sewing the pocket onto the front of your bib AFTER sewing front and back together will give your bib more stability (not as it is shown above)


Top stitch all the way around close to the edge of the bib.  (This will close the opening at the bottom)


My thoughts on picking your closure - A button would be adorable, but I'm too lazy to make the button hole, strings take too long to tie (and make), a velcro bib is easily pulled off by a toddler (so tells me an experienced mother) so I prefer a large snap.

These bibs will get lots of wear so reinforce the ends.

I hand picked this color and weight of thread that looks like the thread used on jeans.  

If you're interested in this pattern, leave me a comment and I'll email you the pdf.  Please make sure that you are not a "no-reply blogger".  

  
linked:


YOU MAY BE INTERESTED IN:

denim quilt


Tuesday, May 25, 2010

Brick Wall Quilt


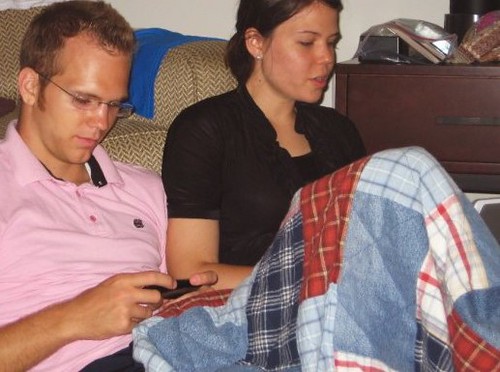
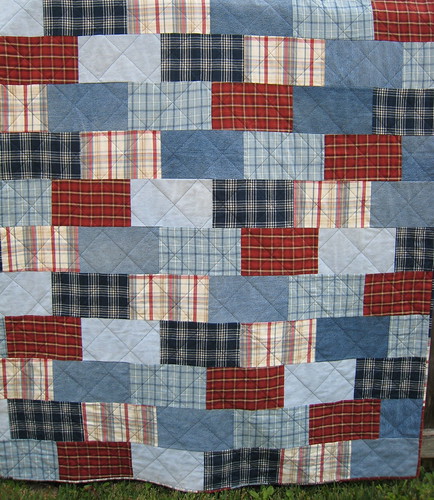
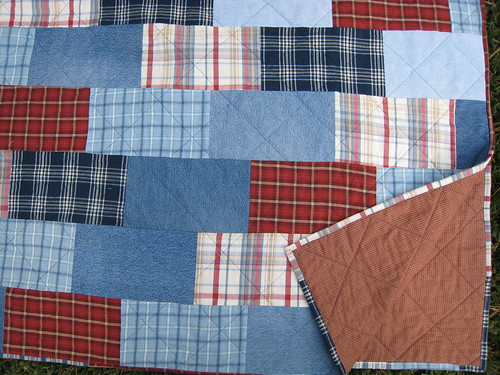
Keep your teen-ager's blue-jeans and collect some cute plaid flannel along the way.  The character of the quilt comes from the the variations of blue on the worn jeans.  This college quilt went to a cold climate, so I backed it with flannel.


Determine the width of the rectangles by how many you can get out of a pair of jeans, front and back.  After cutting all your rectangles (incuding plaids),  choose the sequence in which they will follow each other.   Sew one long row following your chosen pattern with all the rectangles you have cut.

Choose a good width for your quilt, and cut strips from your long original strip.  I chose rectangles  because I didn't want to be sewing through 4 layers of jean fabric (less fabric at intersections).

The seams were thick with the jean and flannel fabric, so I chose a larger tile quilting design.  I used the widest Scotch-Blue Painter's Tape  to help with the tile quilting design, 4 inches I think.  The binding is scrappy.

A quilt creator loves to see their quilts being used!!