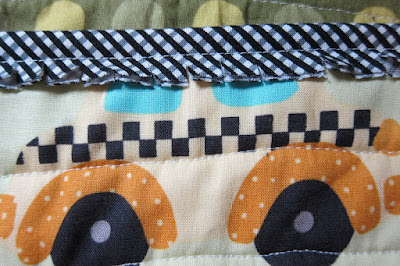
Play quilts are a great option for a gift if you don't have the time for a "pieced quilt".
Pick some cute fabric, I use 1 1/4 yards for each the top and bottom.
I didn't have enough girl fabric for a top of this one, so I pieced it with large 8 inch squares.
I got this these raggy binding instructions from "Elaine's Quilt Block".
Cut your binding strips the width of fabric 4" wide.
Sew strips together and press in half lengthwise. When done, you will have one long strip, folded in half and pressed.
Sew raw edge of binding to raw edge of quilt on the back of the quilt. REPEAT: SEW ONTO THE BACK OF YOUR QUILT, opposite of the way you usually do. I do not recommend doing this past 10 pm. when you're tired, or you will learn that lesson from experience.
Turn or flip binding to top side of quilt and pin down (you can press if you like) or just wing it and sew a bit at a time with no pinning (that's what I do). Stitch in the ditch on the back side.
Turn over and cut open the fold. Clip your raw edges every 1/2" to rag. (Go to this post to learn about "rag sheers" . . . they'll save your fingers.)
Wash several times to rag, cleaning out your lint screen.
It's so cute and fun!! and best of all . . . FAST! No hand stitching.
Click here to learn about Rag Sheers. They will save your hands. Now available at your LQS.
Linked to MANIC MONDAY
YOU MAY BE INTERESTED IN:


The raggy binding is fun and looks great. Visiting from Manic Monday.
ReplyDeleteI like it!
ReplyDeleteThat raggy binding sounds quick and easy, exactly my type of binding!
ReplyDeleteFound your blog on Manic Monday too.
Such cute quilts, great binding technique!
ReplyDeleteVery sweet quilts! Haven't seen the raggy binding before - that's really cute!
ReplyDeleteI've never seen this before. Thanks for sharing!
ReplyDeleteWhat a great idea!
ReplyDeleteGreat binding idea.
ReplyDeletegreat idea for the binding, I will have to try that !
ReplyDeletelove that you have just the raggy bindy...love the ragtime quilt but they are a bit much sometimes. this is perfect :) (pinning again:)
ReplyDeleteLove that effect, thanks. x
ReplyDeleteTutorial says to cut the binding 4" wide, but the pic shows 3". Please explain. Thanks!
ReplyDeleteLove this!
ReplyDelete