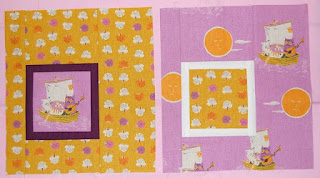
I pulled out an unfinished project to finish for Christmas. I didn't do my research ahead of time when I started this quilt, so I was making each square 1 at a time, and ended up putting it away because it was taking so long.
I found a great tutorial on Kate Conklin's blog on how to make Fussy Framed blocks, 2 at a time! The way she cuts her squares, gives you no waste, and your outer square is a continual design.
You can find that tutorial here. She has some great modern quilt designs. I love the "floating squares" border in this post. Maybe I'll try it on this quilt.
Tuesday, December 14, 2010
Friday, December 3, 2010
Laura's fish - in progress
I couldn't wait to show you my latest project, I'm still hand stitching the binding down and have the basting to take out, but I'll give you a peek. I've always been intrigued by Heather Ross's designs, and one of my favorites is "Lightning bugs and other Mysteries" for Free Spirit. You can still find it being sold on etsy.
I knew this was the right fabric for a quilt for Laura who is a freshman "fish" in college this year (or is that term only used for high school?). It wasn't hard to find fun coordinating fabrics in my stash.
Ever since I discovered Kelly Wuldson's quilts at "Don't Look Now", I've been fascinated by her quilted circles, and decided that this was a good opportunity to try it out . . . I don't know if mine will ever look as good as hers, but it sure was fun.
Scotch-Blue Painter's Tape
I like to use "Scotch-Blue Painter's Tape" to insure straight lines when I quilt a grid pattern. It doesn't pull on my quilt when I remove it, and I can re-use the same strip, and the bright color makes it easy to follow.
Lay your quilt on a flat surface, and lay a strip of tape in the desired direction along the middle of your quilt. Sew along both sides, being careful to not puncture the tape. Working your way towards the edges of your quilt, pick up the tape, reposition and sew.
I used the 2 inch tape on this quilt.
You'll be amazed at how many widths you can find. My favorite is the 2 inch. I can always eyeball adding an inch or so as I sew along the side of the tape on my quilt.
I lay 2, 2- inch strips down on this quilt to create 4 inches.
You can sew your grid design through out your whole quilt, or just portions of it.
Subscribe to:
Comments (Atom)

