Saturday, December 17, 2016

Christmas sewing

I started my Christmas sewing a little late this year . . . like 3 days ago.
First off were these cute stockings.  This buffalo check is pretty popular right now.  The moose fabric is from Joann's.

I used this tutorial that has some nice pictures showing you how to line and put the cuff on your stocking.


The next project was PJ bottoms for the grandkids.


We have 9 grandkids ranging from newborn to 5T.


I really liked this idea for making pj bottoms.  It was super easy.
I made the first pair to test my pattern idea and to make sure that I liked the finished fit, which I did.  Make sure to cut the crotch area with plenty of room.   And to add a good 2 inches to the top for the elastic casing.  Take note that the cutting line for the top is perpendicular to the long side of the pant leg on the right.


After that, I mass produced and was able to finish the other 8 in about 3 hours.


There are literally 3 seams.


I measured each child's waist and length with a piece of yarn . . . they didn't even know what I was doing (so as to keep it all a secret)
I took my singer featherweight along with me while traveling these past few weeks, but I forgot the cord.  I was thrilled when the owner of the local shop had a spare that I could borrow!!!


I didn't finished the edges very well (zigzag), but I did reinforce the crotch.


I would definitely use this method again.  Be sure to take a pair of pants that fits them well currently, and add a good inch all the way around (like the picture with the jeans), for a seam allowance and a little room to grow.


This is Spencer's first time to hold his little 10 day old sister.


It lasted long enough for a quick handful of fuzzy pictures :)

Merry Christmas!!  


linked:


Monday, November 21, 2016

Laura's Lawn Quilt

Wordless Monday
(ok, just lazy).  

A new favorite . . .  giant flying geese


Combine 3 contrasting designs


 Minimize bulk on flying geese


 Read more about this design here.

Fabric is Simply Style by V & Co


Thursday, October 13, 2016

reusable grocery bags

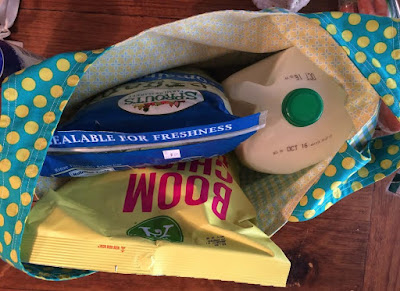
Have you seen the craze for reusable grocery bags on pinterest and IG?  They're definitely the way to go if you don't like the plastic stacking up.  


After some research, I found that I liked this pattern made by "michellepattern" the best:

Michelle's Patterns PDF Grocery Bag Pattern

Michelle's pattern has 3 different options.  The finished sizes are:

small - 12" x 10" x 4"
medium- 13" x 12" x 5"
large- 14" x 14" x 6"


The medium is the size of a grocery store bag, but I prefer mostly large for the grocery store, and a few medium for heavier items.

(both medium)


 The bottom of the bag is sewn in such a way that it opens up. (large)


The great part of this project, is that you can use all those cute fabrics that you bought a long time ago but never put into a quilt because the design in the print was too big.


I've been trying to think of other uses for such a cute bag.  You should definitely keep one in your car!

And you should make them for your kids and grandkids for halloween bags, matching their costume, of course.


Or for a ballet bag.  


Or put them in a basket by your back door so you don't forget them.


What else do you use bags for?  I feel like I'm becoming a bag lady!

and the winners are . . .

Thank you for your comments last week about Jean quilts, Tiffany, your prize is on it's way!

Well, I finally won something at the Blogger's Quilt Festival.  You can see the outcome of the contest here.  My win is at the very bottom in the fine print, under the General Prize Winners (you may have all gotten one for all I know :).  I'm not even sure which entry it was for, probably Outhouse, it got the most hits.


It's always so fun seeing what the other quilting bloggers are into.  There were some really cool quilts this time.  Most of my favorites were in the Modern Quilt category:


 This is a great log cabin variation.  (click on picture for link)


 Birds on newsprint


Very cool free motion quilting.  Click on the picture to go to her blog to see close-ups.


And I had some favorites in the Scrappy Category:

This dim light affect is very nice.


I love this modern design, created by the up and coming Svetlana of SOTAK.  I pretty much love everything she does . . . it just comes natural for some people.


Happy Thursday.

Friday, September 30, 2016

jean rag quilt & giveaway

We have a son in college, and he has a new girl friend.  I figured it was a good time to make his jean quilt with his high school jeans.


 I drew up a pattern and started cutting away.


For each square, I cut a front, a back and the batting, which is 1 inch smaller


sandwich batting between a front and a back square


Sew from one corner diagonally to the other corner.
Repeat, forming an x on each square.  Congratulations, you have just quilted that square, and it holds the batting in place.


finished squares sewn together . . .


Our son served a mission for our church in Bolivia and spent several months in a remote village.  He only had 1 pair of jeans with him to wear.  I used 80% of that pair in this quilt


Those jeans have a lot of tender memories, and give the most character for the quilt.


stats and a few important things to remember:
finished:  60 x 70
20 blocks, 15 inches square
It takes 5-7 pairs of jeans (depending on how long the legs are)
use denim needles 90/14
use 4 color catchers in the washing

With traditional rag quilts, you clip the seams every 1/2 inch or so to create the raggy look, but since jeans fray so well, I just wanted the frayed look.  A few washings took care of that.

Note to self:
After jean/flannel quilt is sewn and ready for washing, fold the quilt in 1/2, flannel sides facing each other (fold longer ends together so that your quilt is long, it will spin better in your washer).
Sew around the 3 open edges with a large stitch.  Then wash.  Undo stitching after washing and drying complete.  This will alleviate HOURS of time having to "de-pill" your flannel side (I may or may not have learned that by experience)


The best part of making a raggy quilt is that after you've sewn your blocks together, IT'S DONE!!!  You quilted it along the way.


giveaway:  winner is Tiffany.


How about you?  have you ever made a jean quilt?  do you have any tips to add?  Leave me a comment if you're interested in this giveaway.

linked:
finish it friday
whoop